Not every guest will book through the widget — plenty still ring the restaurant. When that happens, your team adds the booking by hand. The end result is the same: a confirmed booking in the diary with all the details the kitchen and floor need.
What to ask the guest
Before you open the booking form, get the essentials. It is much quicker than going back and forth:
- The date and time they would like to come in.
- The number of guests.
- A name for the booking.
- A phone number, an email, or both — so the guest can be reached if anything changes, and so they get a confirmation.
- Anything special — allergies, accessibility needs, a birthday or anniversary, a high chair. Better to capture it now than to chase it later.
Creating the booking
- Sign in at manage.makearezzy.com.
- From the left-hand menu, open Bookings. (You can also create a booking from the Calendar or Live Floor Plan if you prefer.)
- Click Create Booking in the top right.
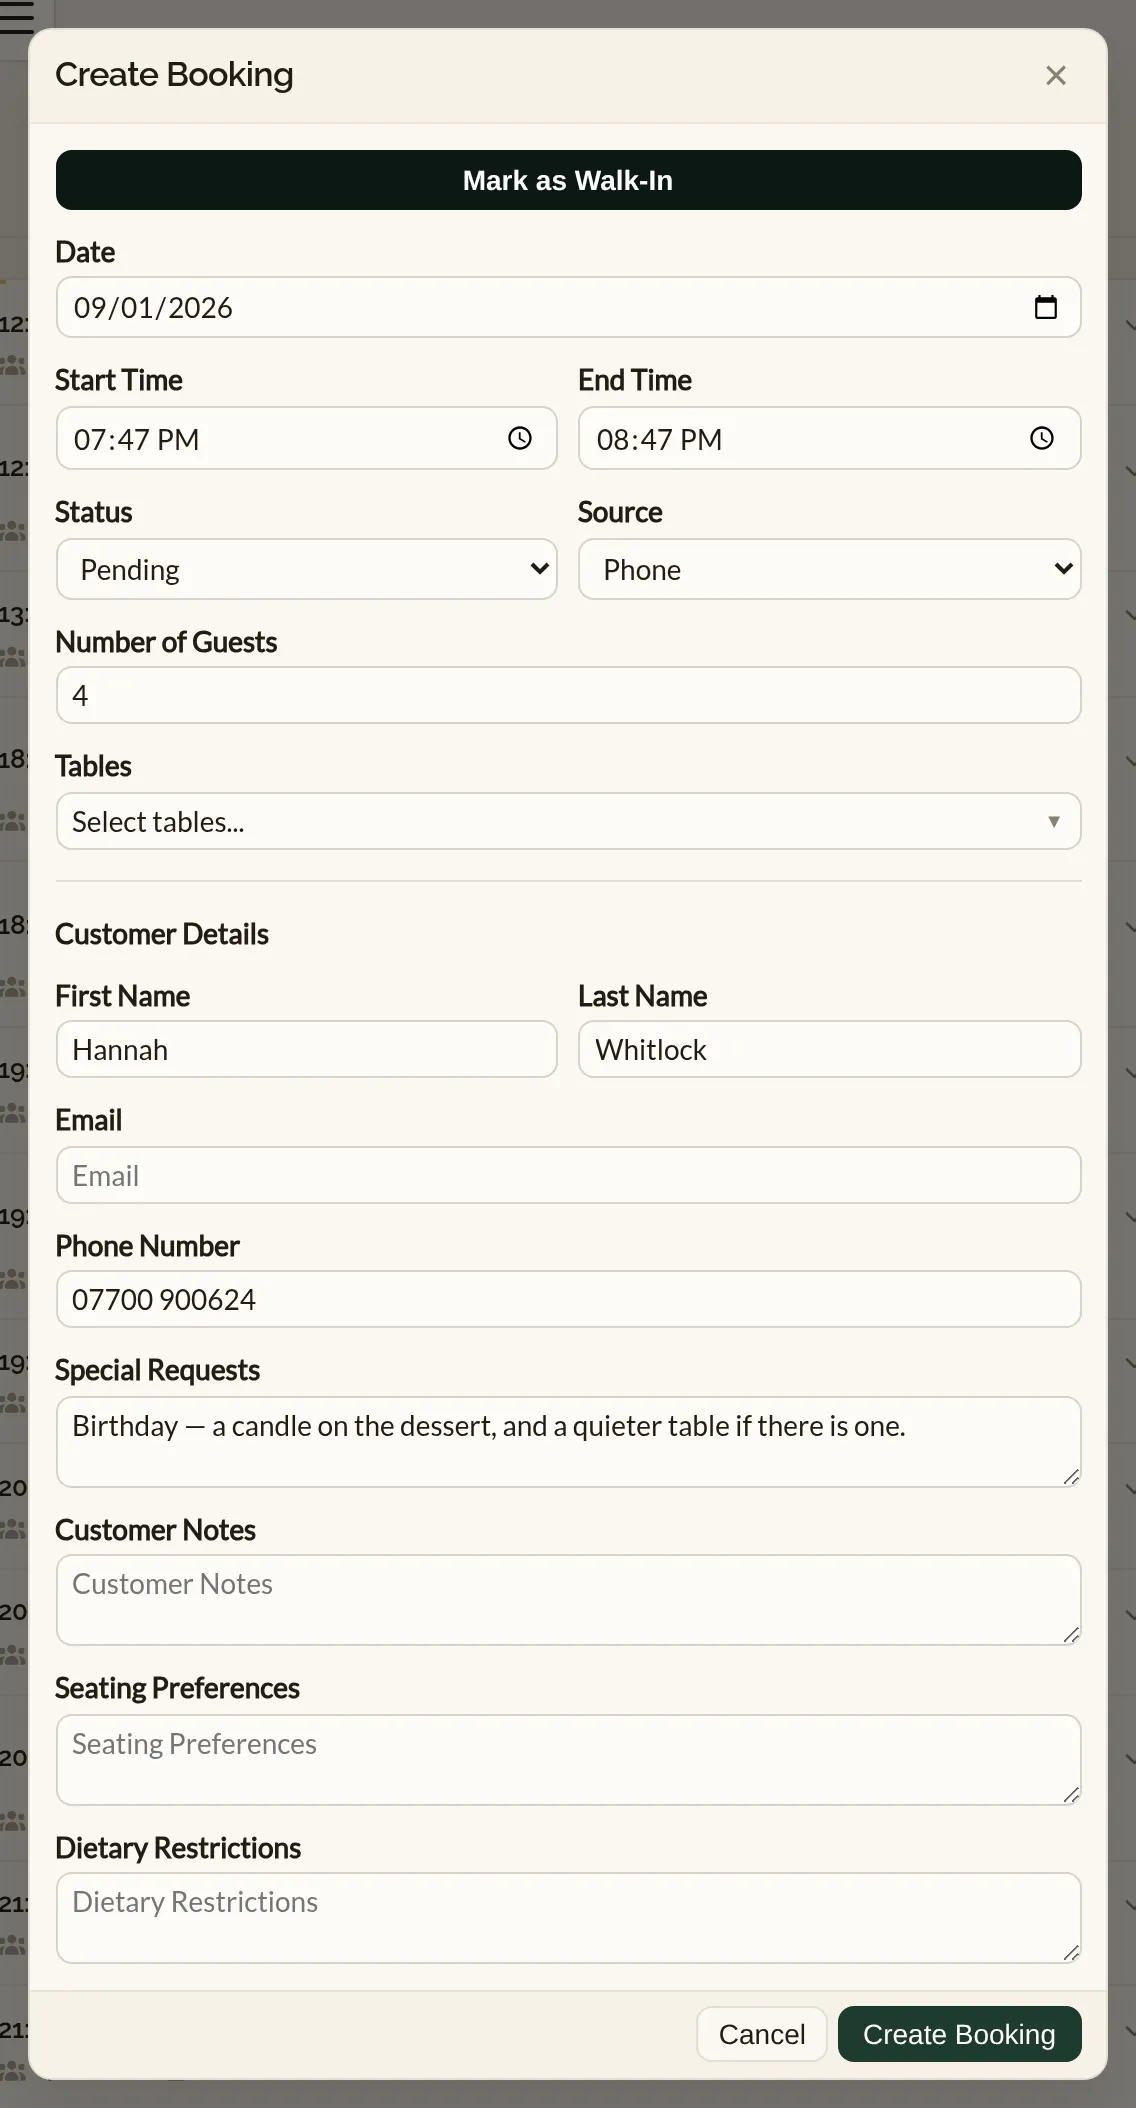
- Fill in Date, Start Time, and Number of Guests. The End Time is set for you based on your default sitting time — change it if the booking needs longer.
- Set Source to Phone so the booking is attributed correctly in your reports.
- Under Customer Details, start with Find a guest: type a name or phone number and pick the guest if they have been in before. Their details fill in, with their notes and dietary needs ready to update. For a new guest, type their first name, last name, and at least one of email or phone number.
- Use Special Requests for anything the kitchen or the floor need to know.
- Click Create Booking.
- Open the Make a Rezzy app and sign in.
- Open Diary and tap Create in the top right.
- Tap the party size.
- Choose when: today, tomorrow, or pick a date, then one of the next times with room for the party. If the guest wants a different time, tap Other time and set it yourself.
- Type the guest's phone number. Guests you already know appear as you type — tap the right one. For a new guest, type their first and last name instead.
- Add a note for the team if there is anything worth knowing.
- Tap Add booking.
The booking is saved as Confirmed with its source set to Phone. A message at the bottom of the screen confirms it and shows the table it was given; tap Change table or Assign table to put it somewhere else. The best free fit for the party is suggested.
Quick add keeps to the essentials. If you need any other field — end time, status, source, email — tap the booking once it is saved and tap Edit details. See Modifying a booking.
The booking lands in the diary straight away. If the guest gave an email, a confirmation is sent on the spot.
Booking a service for a guest
If the guest is ringing about a class or an appointment rather than a table, the same Create Booking button takes the booking:
- Click Create Booking on the Bookings page or the Calendar.
- If your business takes both table and service bookings, choose Service at the top of the form. A services-only business goes straight to the service form, and the Calendar's Services view opens on it too.
- Choose the Service, then the Option the guest wants. A service you have not published yet is marked (hidden) — guests cannot book it themselves, but your team can.
- For an appointment, pick a Team member if the guest has asked for someone — only members who provide that service are listed, and the times then follow what that person can take. Leave it as Nobody assigned to decide later.
- Pick the Date, then choose one of the times on offer for that day. Each time shows how many places are left. If the day has no times at all, Next available jumps to the next day that can take the party.
- Set the Number of Guests. Beneath the field the form shows the smallest and largest party the service allows in one booking — for example "Up to 2 guests per booking". A party outside that is refused when you save, and the form tells you why. A larger group is booked as separate bookings, one per party the service takes.
- Find the guest or fill in their details as usual, and save.
The times on offer come from the service's schedule, and the booking's length comes from the option you picked — there is no end time to set. A service booking your team makes starts as Confirmed unless you choose another status.
When a time is full
A time with no places left reads Full — or Unavailable where the places depend on your team, which can also mean nobody is on shift then. Your team can still pick it: the form asks you to confirm, then books the guest in over capacity. The one thing it will not do is double-book a team member — if the person you picked already has a booking or a class at that time, the form says so and you can choose someone else or another time.
Services that take payment
Guests who book online pay online. A booking your team makes takes no online payment, so for a service with a price or a deposit the form shows what to collect from the guest in person — for example "£20 deposit to collect in person".
Owners and Admins can also start from the service itself: open it under Services and click Book a guest in. The form opens with that service already chosen. For a class, the quickest route is the Calendar's Services view: click the session's block and the form opens with the class and the time already chosen.
- Tap + on Today or in the Diary. A business that takes only service bookings goes straight to the service form; one that takes both gets a Table / Service switch at the top — tap Service.
- Tap the Service, then the Option the guest wants. A service you have not published yet is marked (hidden).
- For an appointment, tap a Team member if the guest has asked for someone, or leave it as Nobody assigned. The times then follow what that person can take.
- Choose the day — today, tomorrow, or pick a date — then tap one of its times. Each time shows how many places are left; a time with none reads Full (or Unavailable where the places depend on your team) and can still be booked after a quick confirmation. If the day has no times, Next available jumps to the next day that can take the party.
- Set the number of guests with − and +. Beneath the buttons the form shows the smallest and largest party the service allows in one booking — for example "Up to 2 guests per booking". A party outside that is refused when you save, and the form tells you why. A larger group is booked as separate bookings, one per party the service takes.
- Choose who the booking is for: type a phone number or name and tap the guest, or type a new guest's first and last name.
- Tap Book.
The booking is saved as Confirmed with its source set to Phone. No payment is taken online for a booking your team makes: for a service with a price or a deposit, the form says what to collect from the guest in person.
Status and what it means for phone bookings
The Status field controls what happens next:
- Confirmed — the most common choice for phone bookings. The booking is set, the table is held, and the guest gets a confirmation email.
- Pending — use this if you want to call the guest back before committing.
Handling busy slots
When an operator creates a phone booking, the form does not check the time against your opening hours or services — it will save whatever you give it. That is by design: the host on the phone has more context than the system does. The flip side is that the judgement call is yours. A few practical things to think about when the diary looks tight:
- Offer a nearby time — fifteen or thirty minutes either side of what they asked for is often easier to absorb.
- Check the floor plan — sometimes there is a table that has not been allocated automatically. You can attach the booking to a specific table from the floor plan view.
- Be careful with the hard cases — the form will not stop you from saving a booking that sits outside opening hours or runs over what your kitchen can absorb. Only do it when you are sure the kitchen and the floor can keep up.
Returning guests
If the guest sounds familiar, it is worth checking the Returning Guests page before creating the booking. Their profile holds previous bookings, dietary notes, and any tags you have added (VIP, regular, dietary). That context is much more useful for the floor than a blank phone booking.
Where to go next
- Modifying a booking — when the guest rings back to change the time or party size.
- Cancellations and no-shows — how to handle the awkward calls.
- Deposits and refunds — how deposits work and what happens when a guest cancels.
See also: The restaurant booking diary