Every booking is tied to a guest, and each guest has a profile that pulls their history together in one place — their details, how often they visit, what they have spent, and any reviews they have left. This article walks through what is on a profile and how to find it.
Where to find your guests
Sign in to the manager site, pick your business, and go to Guests in the sidebar. You will see a table with every guest the system has on record, sorted by name. Each row shows the guest's name, email, phone, and company, with small markers next to anyone who has dietary, seating, or notes attached, plus any tags you have applied.
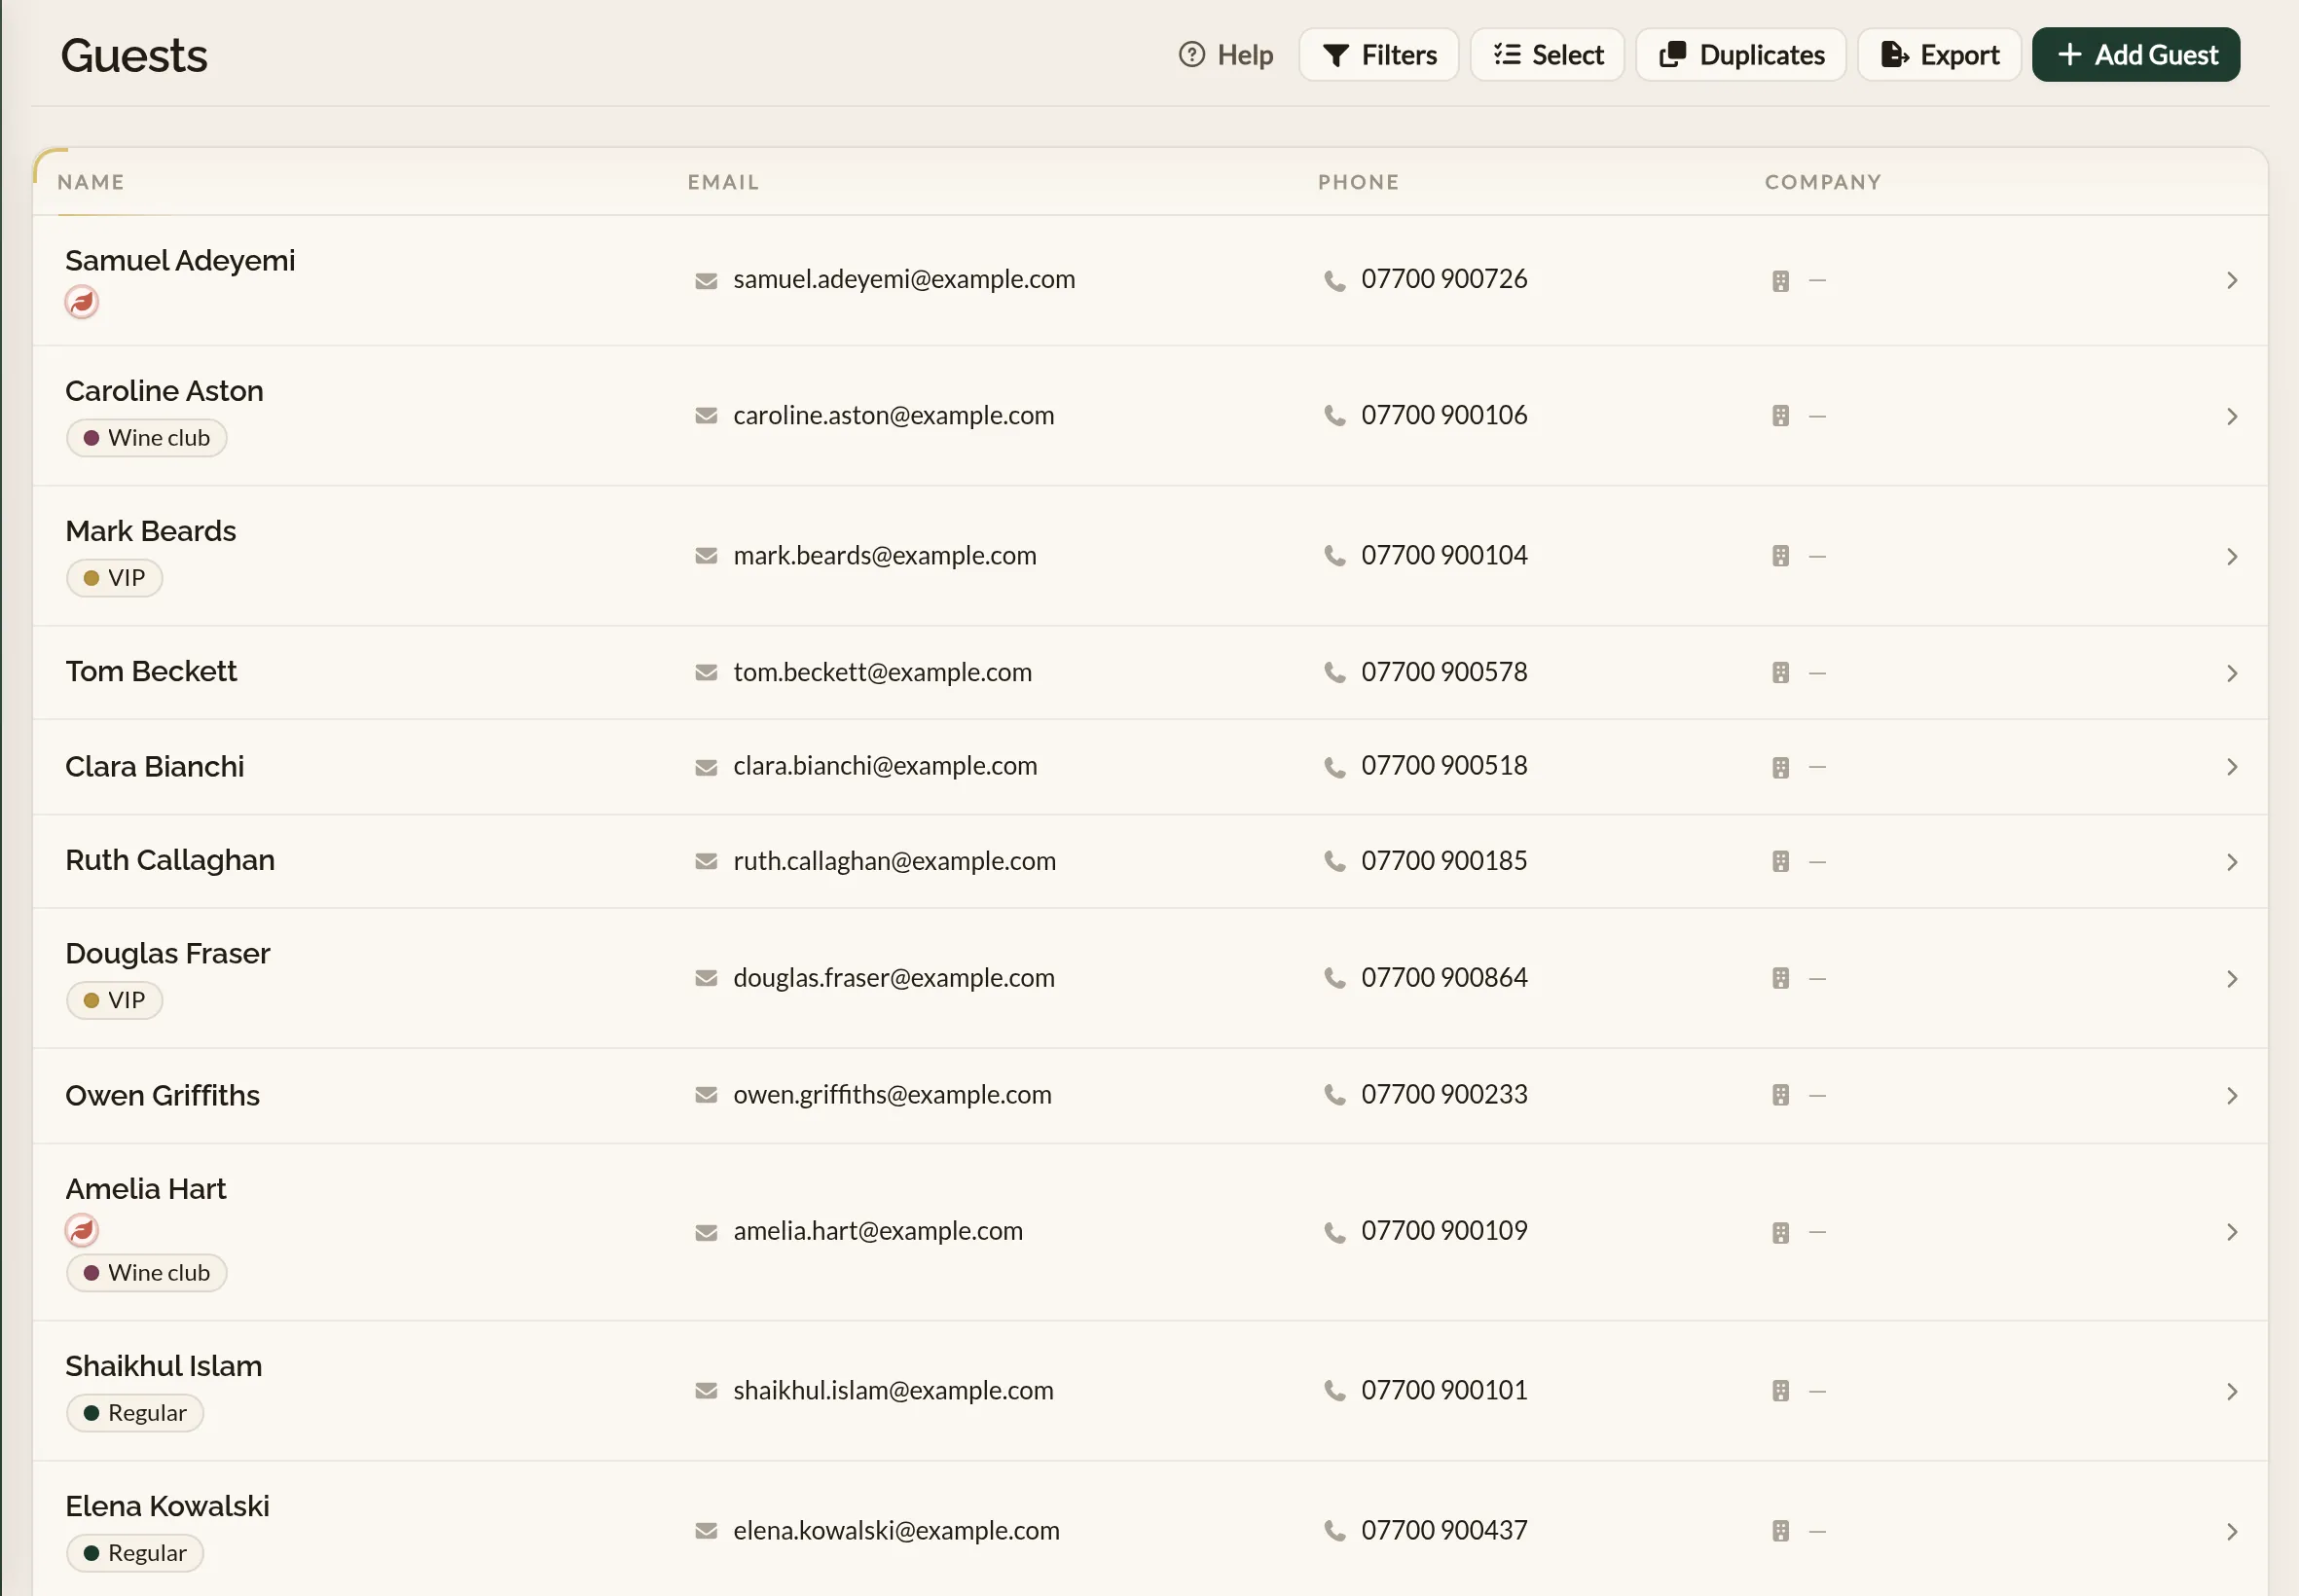
Click any row to open the full profile. To narrow the list — or to export it — see Finding and exporting guests.
In the mobile app, open the Guests tab. It opens with a search box and the number keypad, so the quickest way to a guest is to type the last few digits of their phone number. Tap ABC beside the box to search by name instead.
Below the search box, the guest book is in three parts: Arriving today lists everyone with a booking still to come today, in order of arrival; Recent lists guests who have visited in the last month; and All guests lists everyone, loading more as you scroll. A coral edge on a card means the guest has a dietary need. Tap any card to open the profile.
At a glance
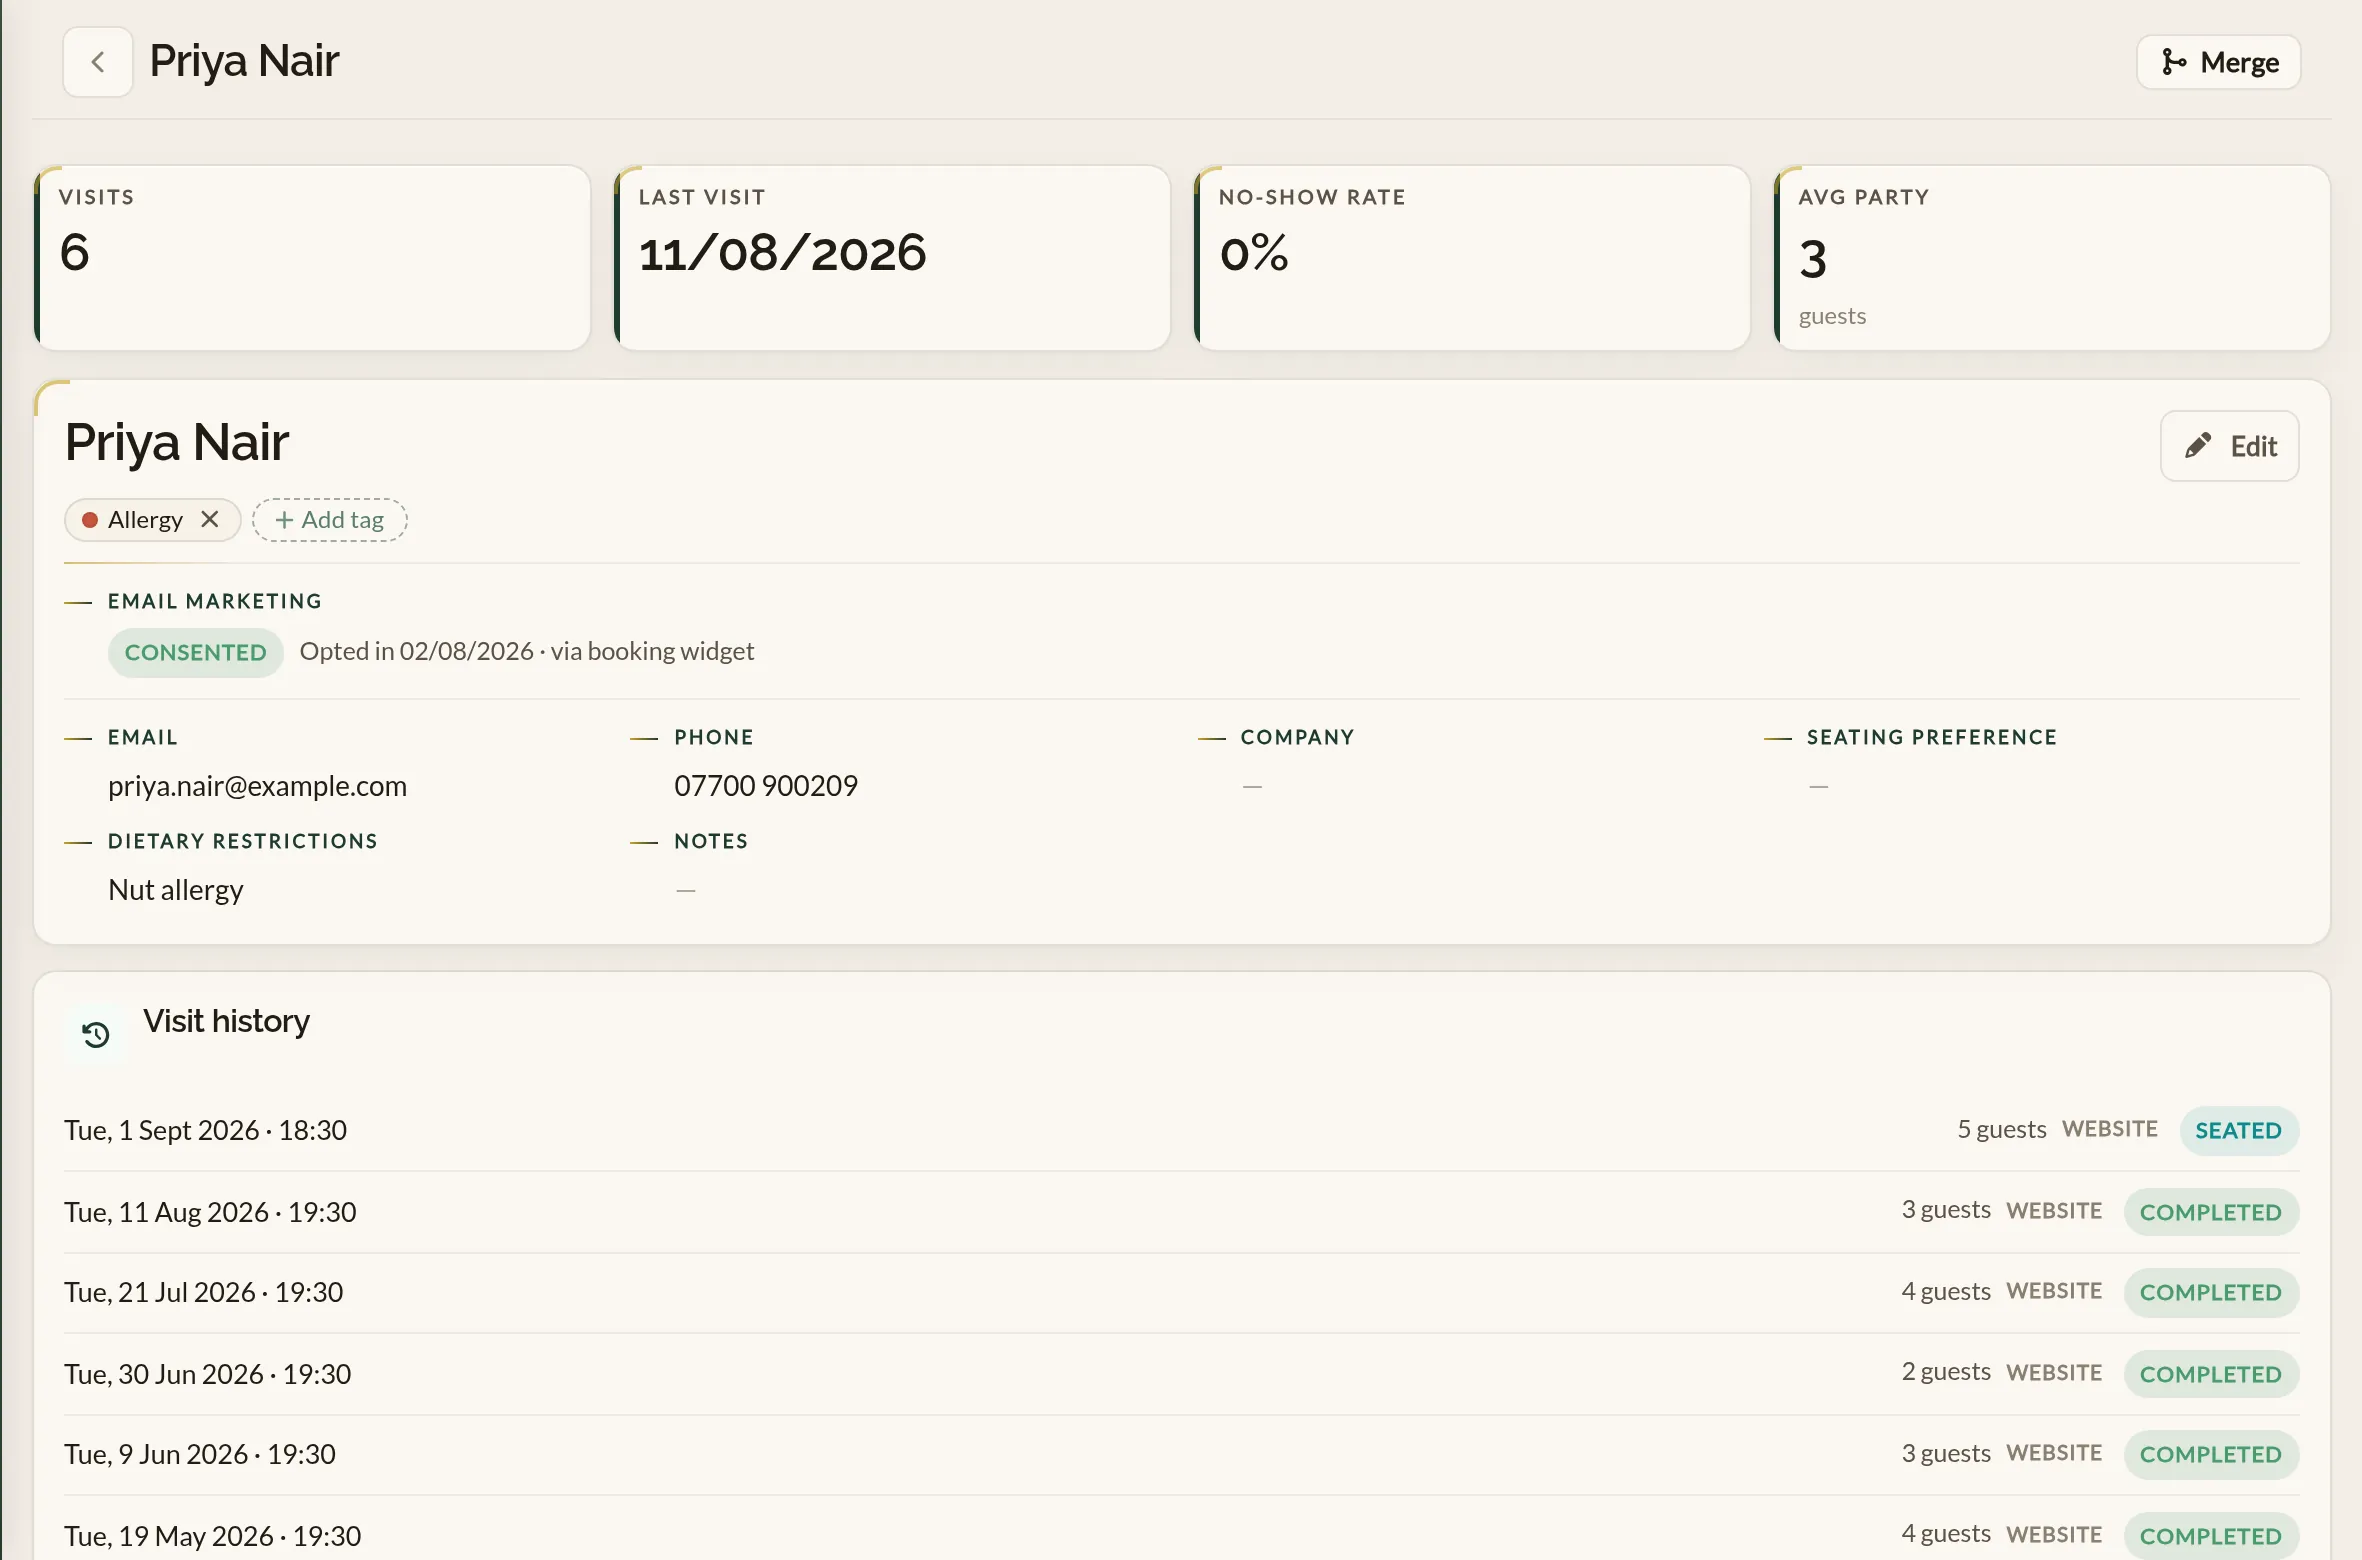
Across the top of a guest's profile is a row of figures that sum up their history with you:
Beneath the guest's name and the buttons to call, message, WhatsApp or email them is a row of tiles that sum up their history with you:
- Visits — how many times they have booked. If they have bookings still to come, the number of upcoming visits is shown alongside.
- Last visit — the date they most recently dined with you, or a dash if they have not visited yet.
- No-show rate — the share of their bookings that ended as a no-show, shown as a percentage.
- Average party — the typical number of guests on their bookings.
- Lifetime spend and average spend per cover — what they have spent with you in total, and on average per head. These appear once spend has been recorded for the guest; spend comes from a connected till — see How the Square sync works.
- Visits — how many times they have dined with you, with the number of upcoming bookings beneath when they have any.
- No-show rate — the share of their bookings that ended as a no-show. It turns coral once it reaches one in four.
- Last visit — how recently they came, or a dash if they have not visited yet.
- Average party — the typical number of guests on their bookings.
Once spend has been recorded for the guest from a connected till, a line beneath the tiles shows what they have spent in total and per cover.
Guest details
Below the summary is the guest's details:
- Email — used for booking confirmations and any reminders you have set up.
- Phone — useful for last-minute calls; never shown to other guests.
- Company — handy if you take corporate bookings, otherwise leave blank.
- Seating preference — a short note like "window table" or "away from the kitchen".
- Dietary restrictions — gluten-free, nut allergy, vegan, and so on.
- Notes — free text. Anything your team should know that does not fit the fields above.
The profile also shows the guest's tags — reusable labels like a VIP regular or a no-show risk — which you can add or remove here. See Tags.
A marketing consent line shows whether the guest has opted in to marketing email. This is read-only: guests opt in themselves when they book. See Marketing consent.
In the app, dietary restrictions, seating preference and notes sit together in the Good to know card, with the dietary need flagged in coral. Add note on the card adds a dated line to the notes without opening the full form, and the keyboard's microphone lets you dictate it. The guest's tags show beneath their name; tap Edit tags to apply or remove any from your business's list. A line at the foot of the card shows whether the guest has opted in to marketing email; guests opt in themselves when they book, so it cannot be changed here.
Visit history
A guest's profile lists every booking they have made with you, newest first. Each entry shows when they came, the size of the party, where the booking came from, its status, any tags on that visit, and a star rating if they reviewed it. A guest who has not booked yet simply shows "No bookings yet."
Bookings still to come are listed under Upcoming; tap one to open the booking. Past bookings follow under Visit history, newest first, each with the date and time, the size of the party, where the booking came from, its status, and a star rating if the guest reviewed it. A New booking button opens the quick booking form with the guest already chosen — for a table, or for a service where the business offers them.
Reviews
Any reviews the guest has left after a visit are gathered at the bottom of their profile, each with its star rating, date, title, and comment. To learn how review requests are sent, see How reviews work.
Editing a guest
Click Edit on the details card, change any field, and click Save changes.
Open the guest, tap Edit at the top of the profile, change any field, and tap Update Customer.
Edits stick to the guest, so the next booking you take for them will see the new details.
Adding a guest by hand
Guests are created automatically the first time someone books, so you rarely need to add one manually. When you do, you can:
- Open the Guests page.
- Click Add Guest in the top right.
- Fill in at least a first and last name. The rest is optional.
- Click Save changes.
- Open the Guests tab.
- Tap Add at the top of the screen.
- Fill in at least a first and last name. The rest is optional.
- Tap Create Customer. The new profile opens.
Where to go next
- Finding and exporting guests — filter the list, save a filter as a segment, and export to a spreadsheet.
- Tags — reusable labels for guests and visits.
- Notes, dietary, and seating — how to make the most of the free-text fields.
- Returning guests and merging — how a new booking is matched to an existing guest, and how to merge duplicates.
See also: The restaurant guest CRM