Once you have signed up, the first thing to do is fill in your business details. Guests see most of these on your booking widget and your Explore listing, and Make a Rezzy uses some of them — your timezone, sitting time, and booking rules — to work out availability.
You can come back and change any of this at any time. Nothing here is set in stone.
Where business details live
Business details are split across five tabs. You do not have to fill them in all at once, but the more complete your listing, the better it looks to guests.
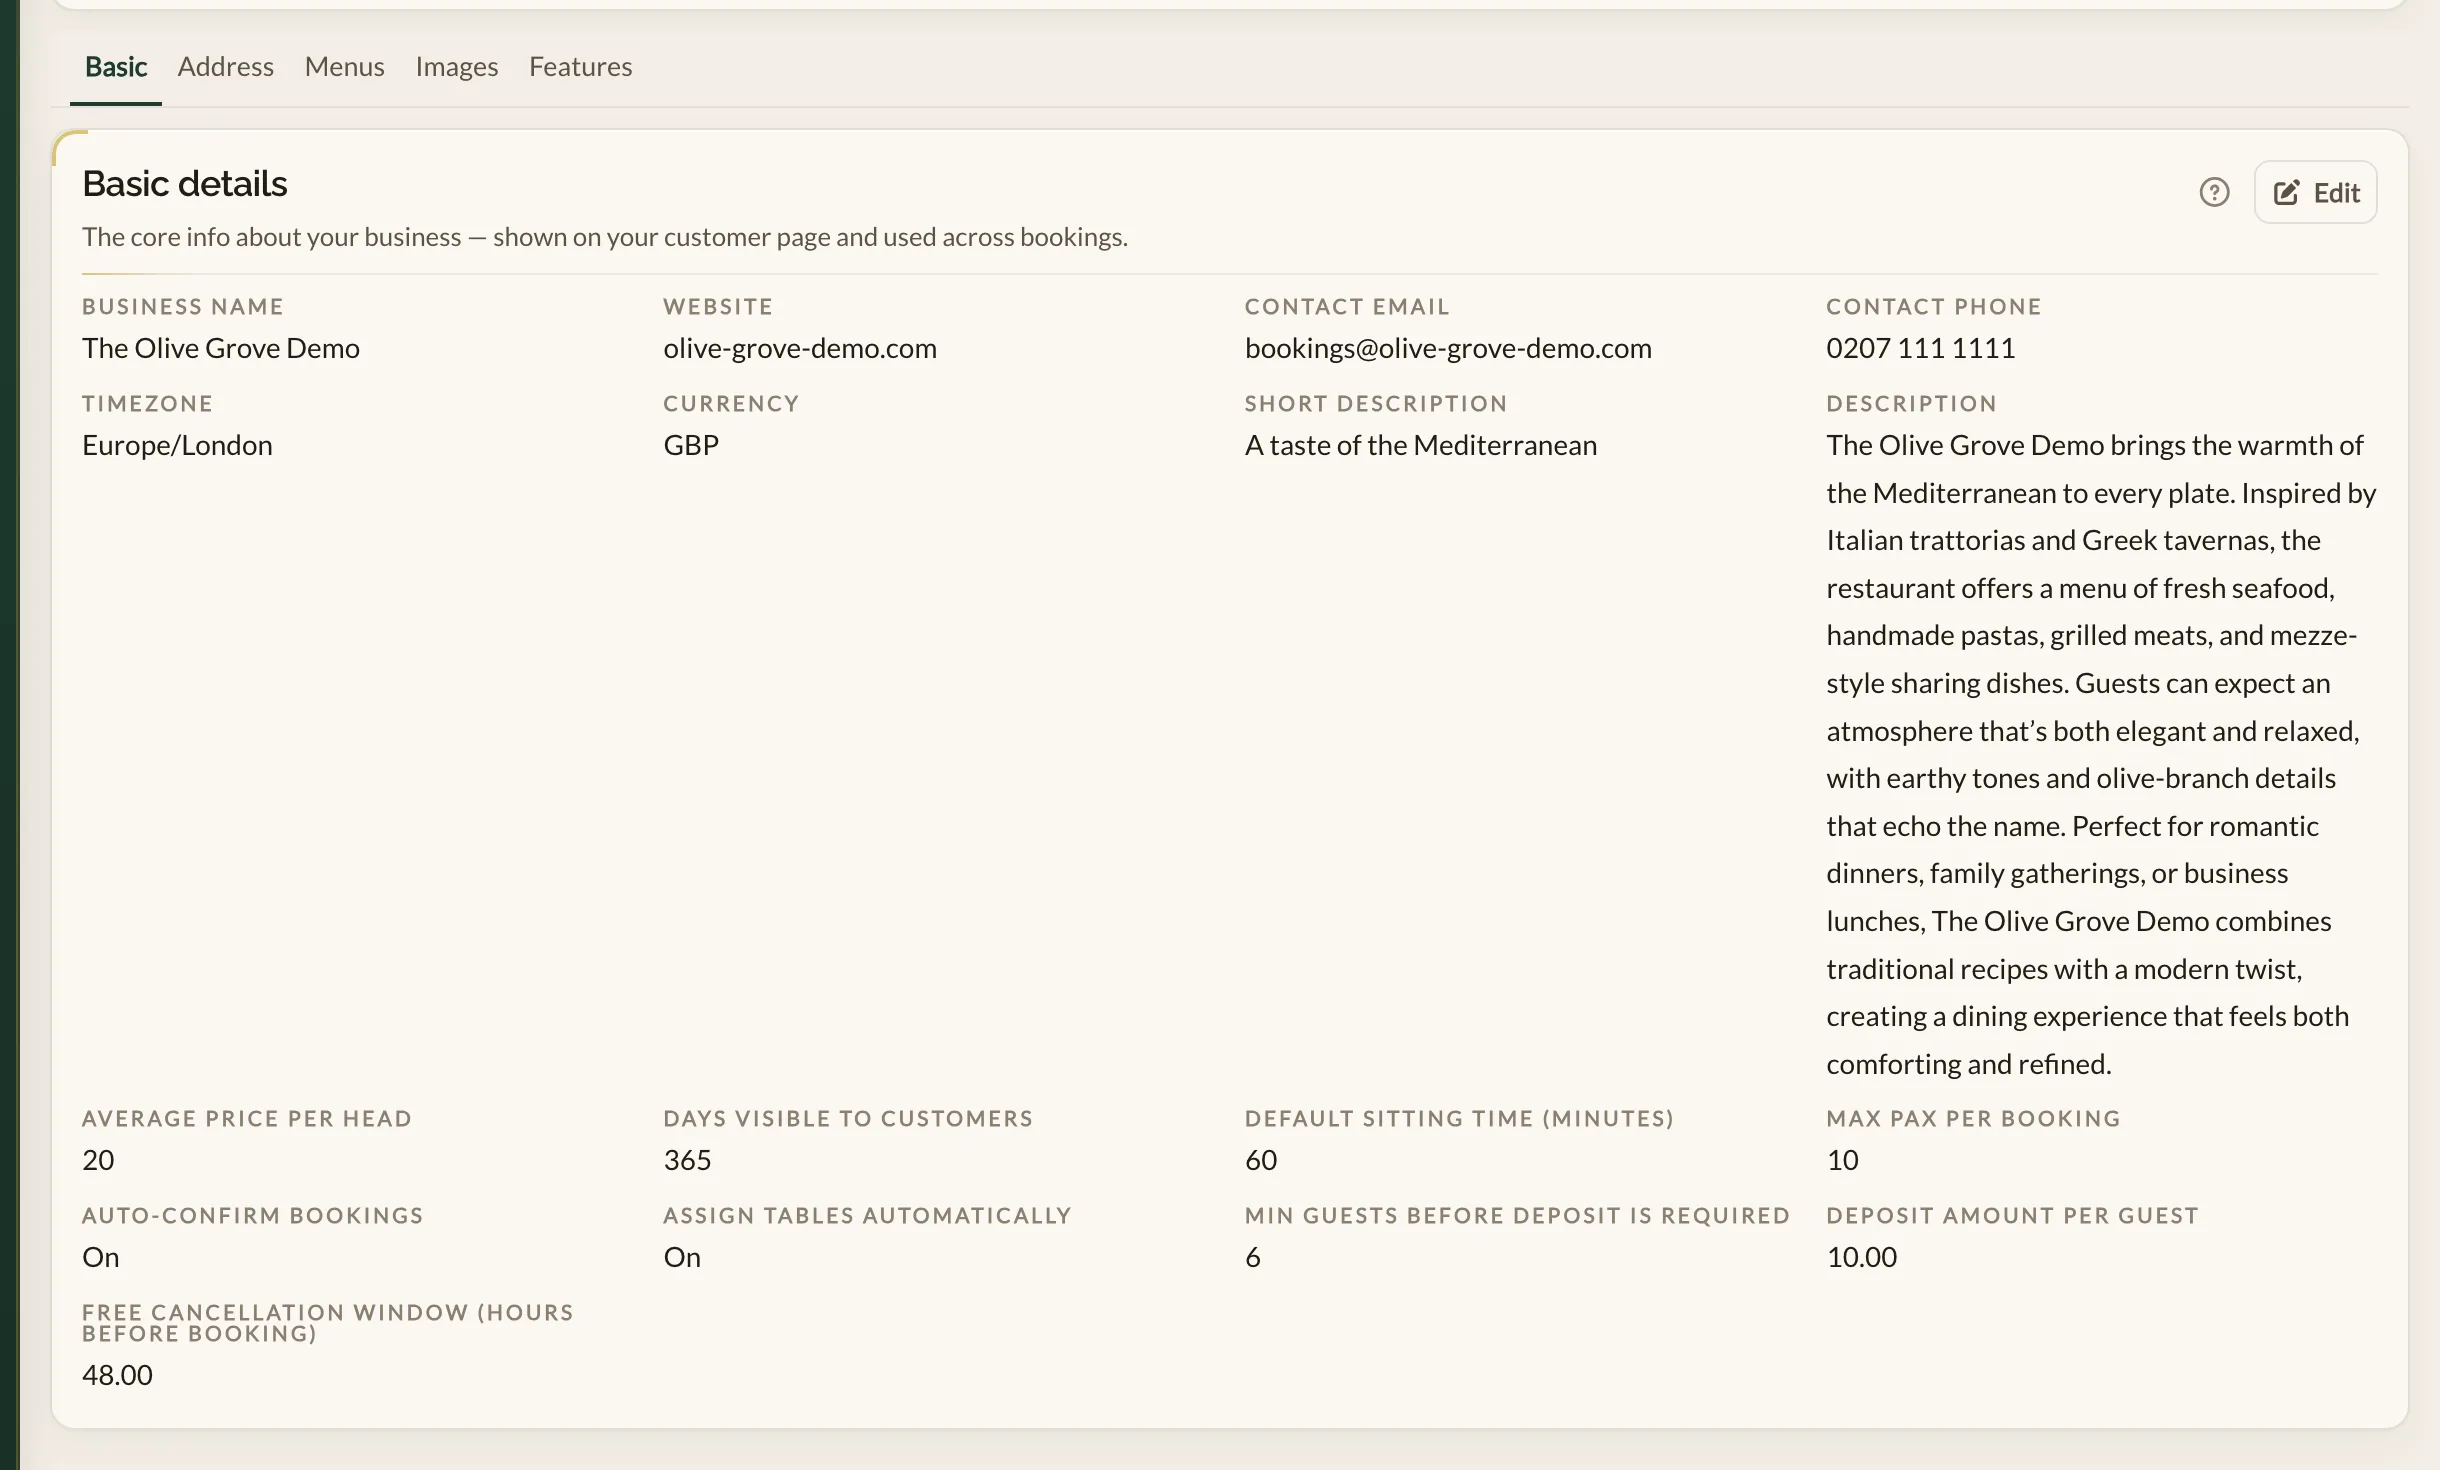
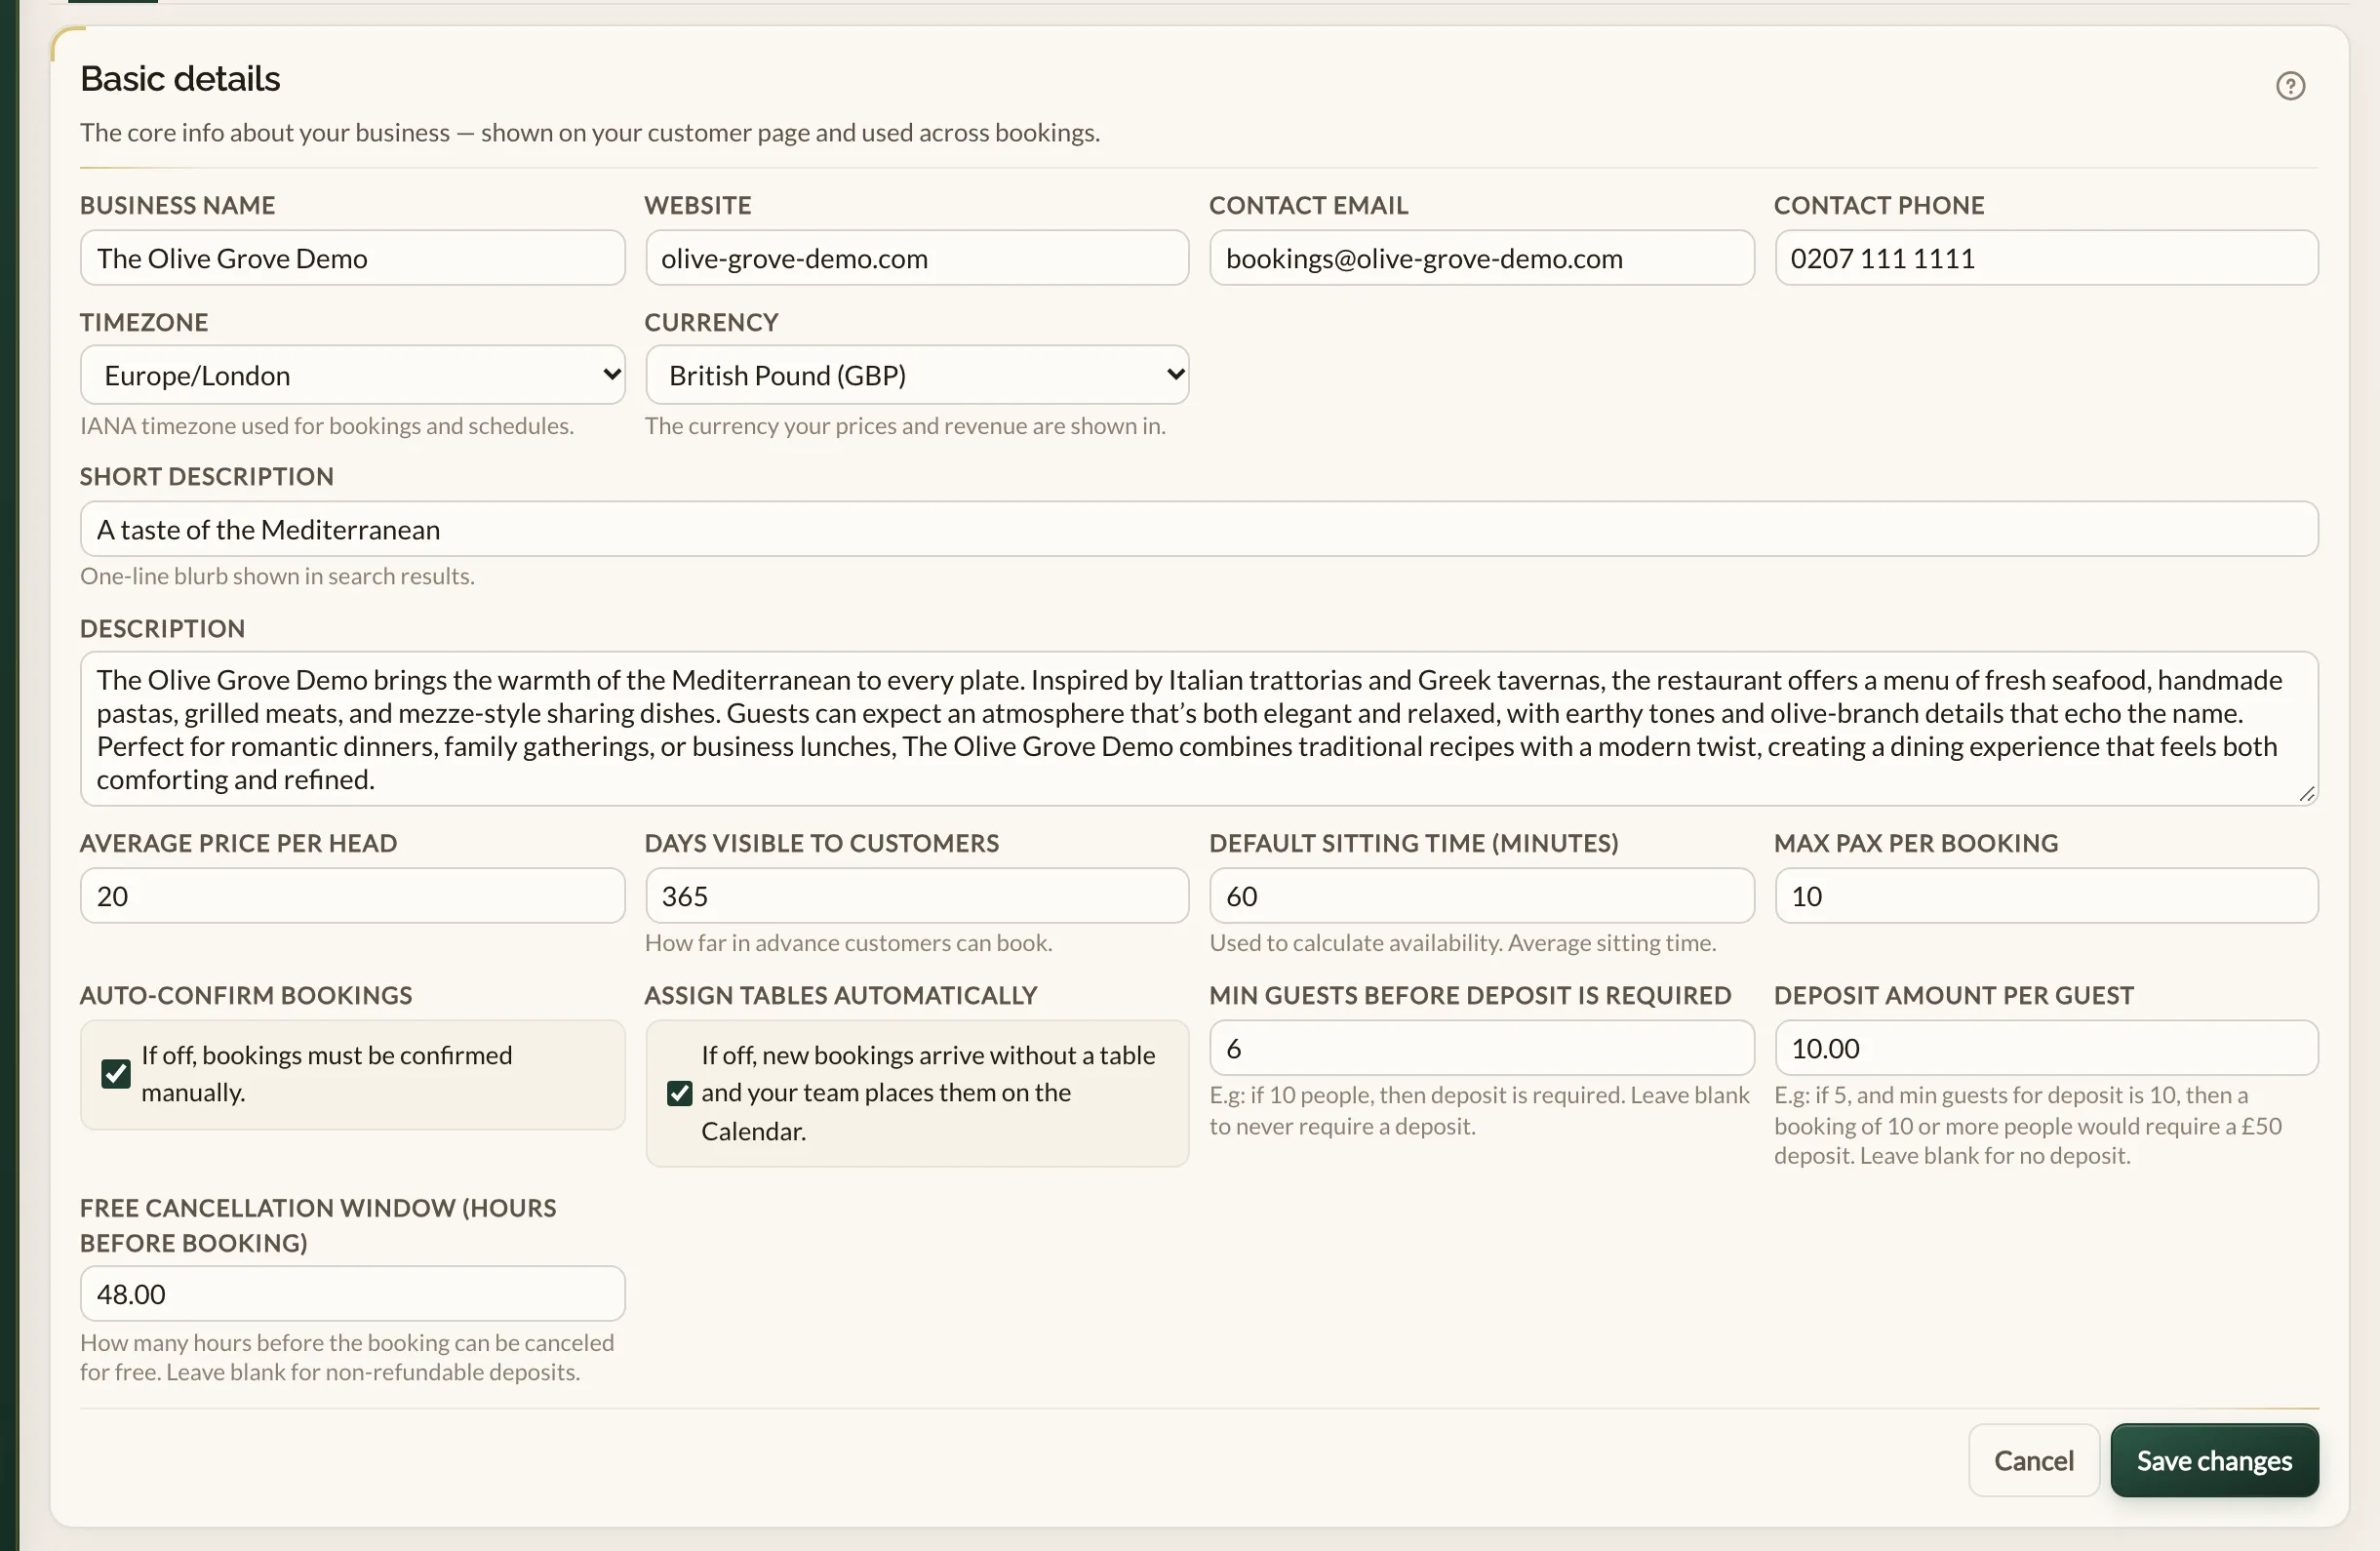
- Basic — your name, contact details, timezone, descriptions, and the booking rules (sitting time, deposit, free-cancellation window).
- Address — where the restaurant is. Used for your Explore listing and for directions in confirmation emails.
- Menus — upload your menus as PDFs or images so guests can read them before booking.
- Images — your cover photo and gallery shots. The cover photo is the first thing guests see on your Explore listing.
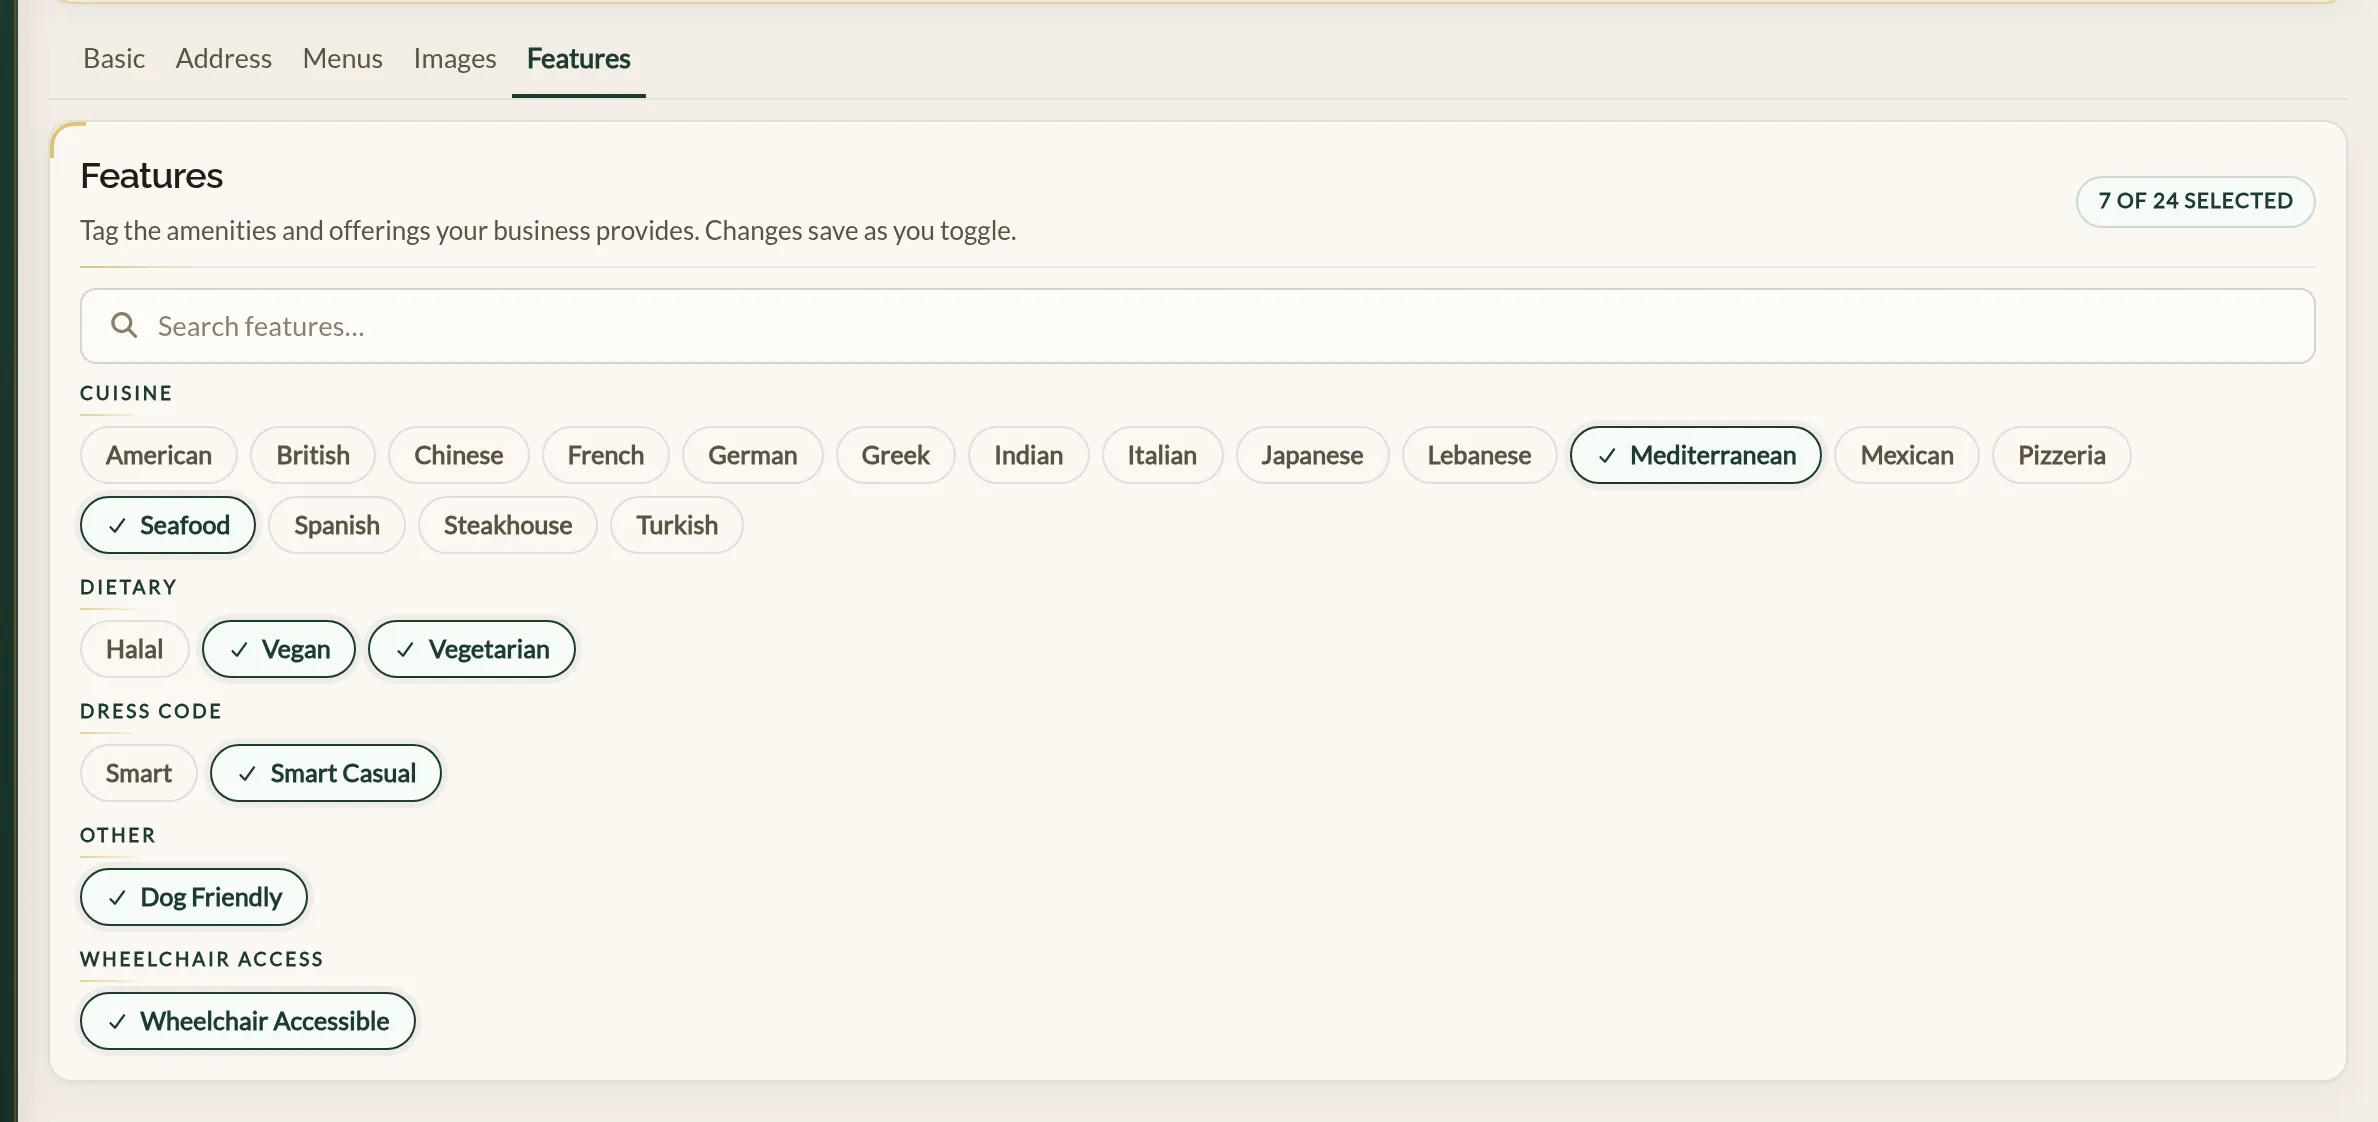
- Features — the things guests filter by: cuisine, dietary options, dress code, wheelchair access, and so on.
Filling in the basics
- Sign in at manage.makearezzy.com.
- From the left-hand menu, open Business details.
- You will land on the Basic tab. Click Edit in the top right of the section to start typing.
- Fill in your business name, website, contact email, and phone number. The email and phone are what guests will see if they need to reach you.
- Set your timezone. Make a Rezzy tries to detect this for you, but check it before you save — every booking time you set is interpreted in this zone.
- Click Save.
- Open the Make a Rezzy app and sign in.
- Open More, then tap Business details under Setup.
- Expand Basic Details and tap the pencil to edit.
- Fill in your website, contact email, phone, timezone and descriptions. Your business name is changed on the web.
- Tap Save.
Descriptions guests will read
On the Basic tab there are two description fields:
- Short description — a one-line blurb shown next to your name in search results. Keep it punchy.
- Description — a longer write-up shown on your full Explore listing. A paragraph or two on what makes the restaurant worth a visit is plenty.
Booking rules
The Basic tab is also where you set the rules that shape how guests can book:
- Days visible to customers — how far ahead a guest can book. Set this to how far in advance you want to take bookings.
- Default sitting time — roughly how long a table is held for one party. Used to work out when a table frees up.
- Max pax per booking — the largest party a customer can book for themselves, on your page, through your website widget or through a connected system. Your team can still book a larger party from the management app.
- Auto-confirm bookings — when on, bookings are confirmed the moment they are made. When off, they sit in Pending until your team confirms.
- Assign tables automatically — when on, each new booking is given a table straight away. When off, bookings arrive without a table and your team places them on the Calendar. Availability is still worked out from your tables, so guests are only offered times you have room for.
- Deposit rules — the size of party that triggers a deposit, the amount per guest, and how long before the booking guests can cancel for a full refund.

For more on the deposit rules, see Deposits and refunds.
Address, menus, images, and features
Work through the remaining tabs in any order. The Images tab needs a cover photo — without one your listing looks empty - but everything else is optional but worth filling in to make your listing as attractive and accurate as possible.
What to do next
Once your business details are in, the next step is to set your opening hours so bookings can actually come in. Carry on to Setting your opening hours, or head straight to Taking your first booking for the end-to-end walkthrough.
See also: Every feature in Make a Rezzy