Events are for the nights that do not fit your normal service — tasting menus, supper clubs, mother's day specials, anything ticketed. Once an event is created and published, guests can book a place on it from your restaurant listing.
Where events live
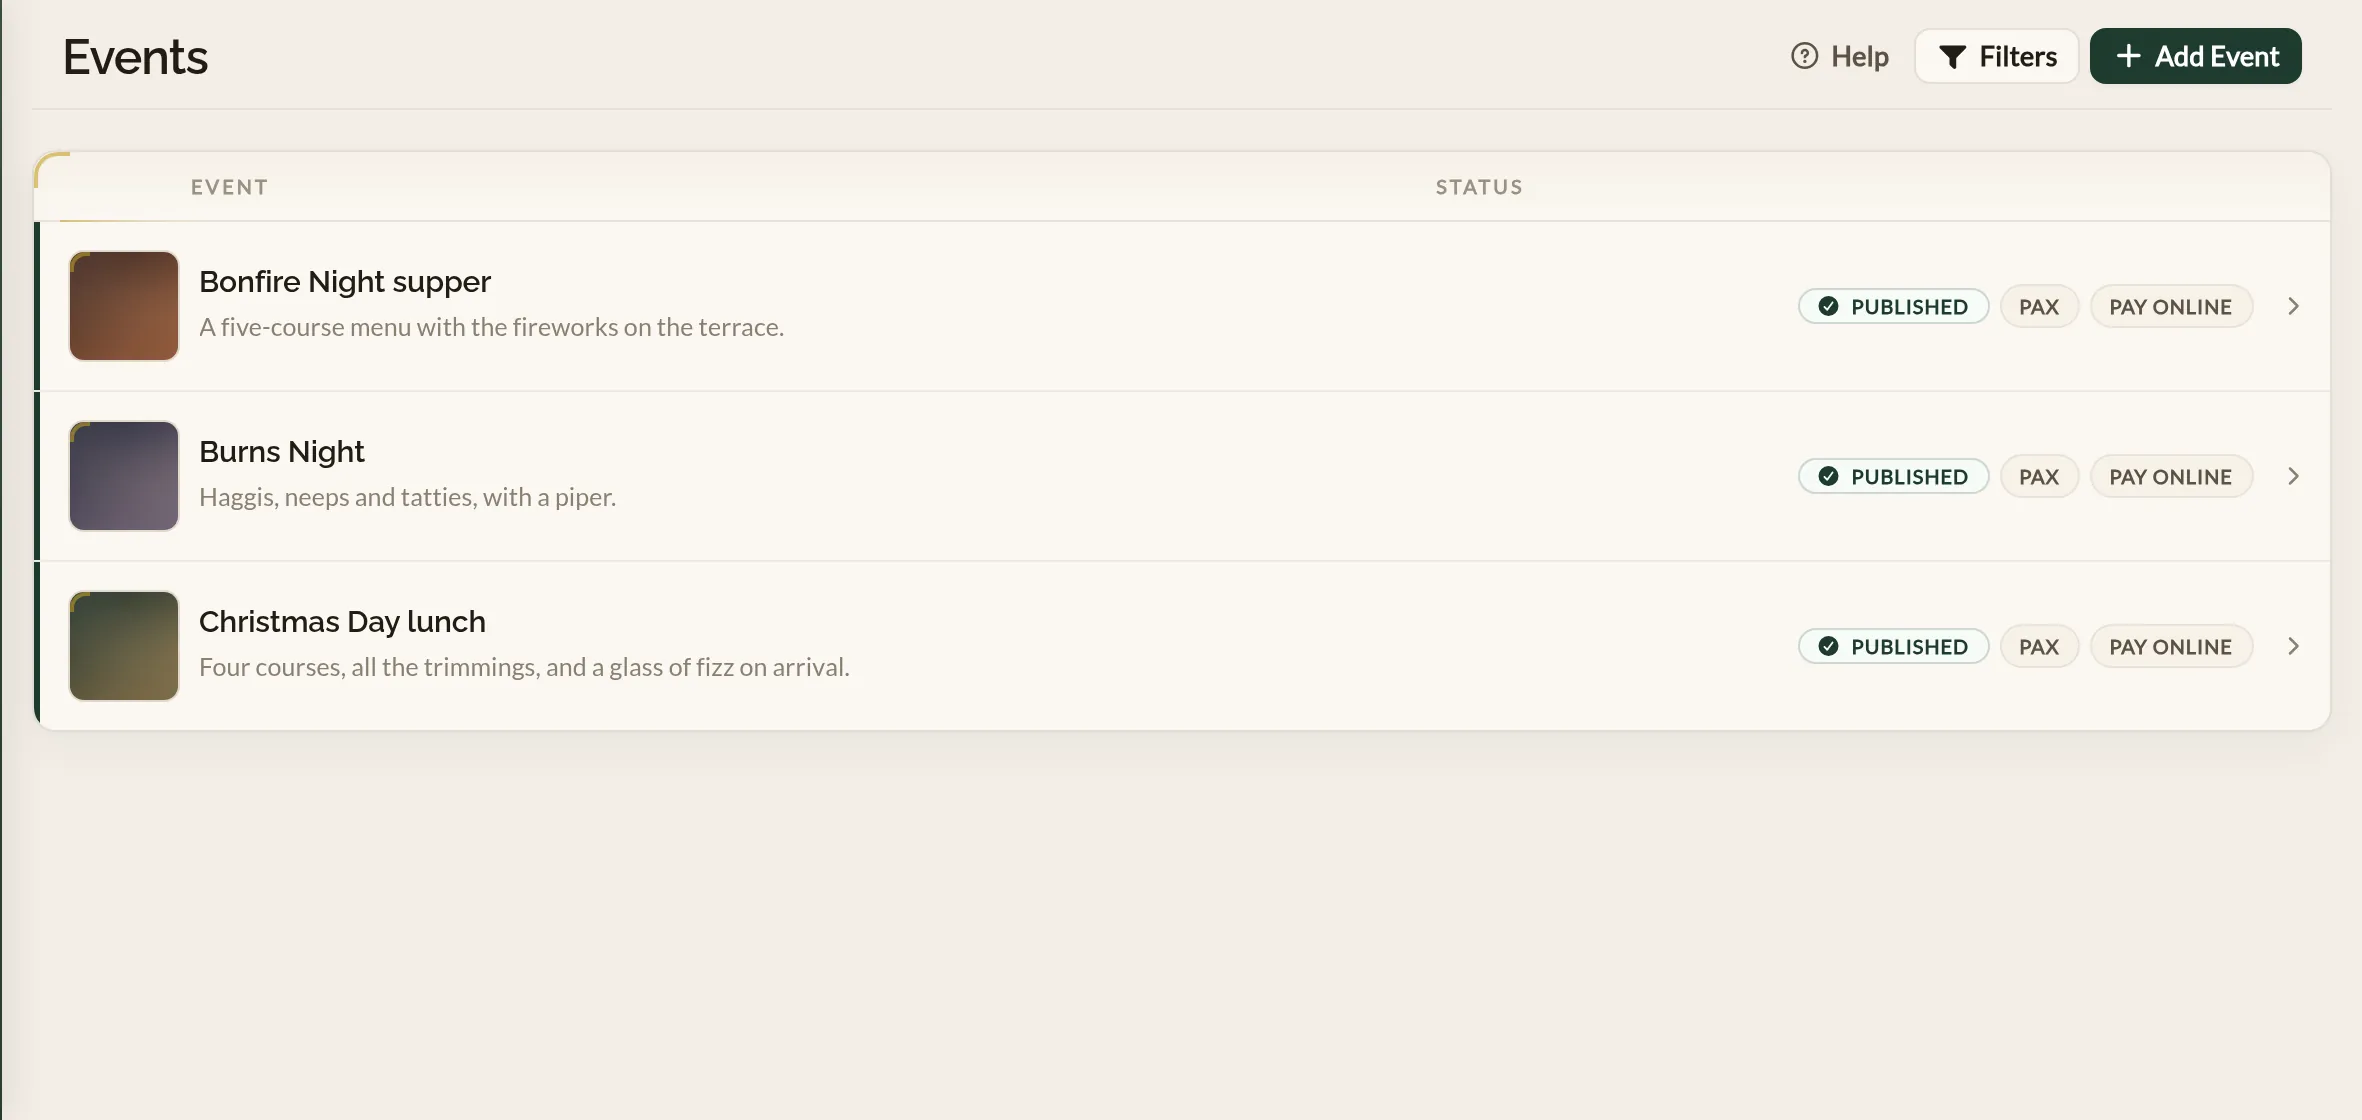
Sign in to manage.makearezzy.com, pick your business, and open Events from the left-hand menu. The list shows every event you have set up — past, present, and draft. Click any event to see its summary; click Add Event to start a new one.
The event form
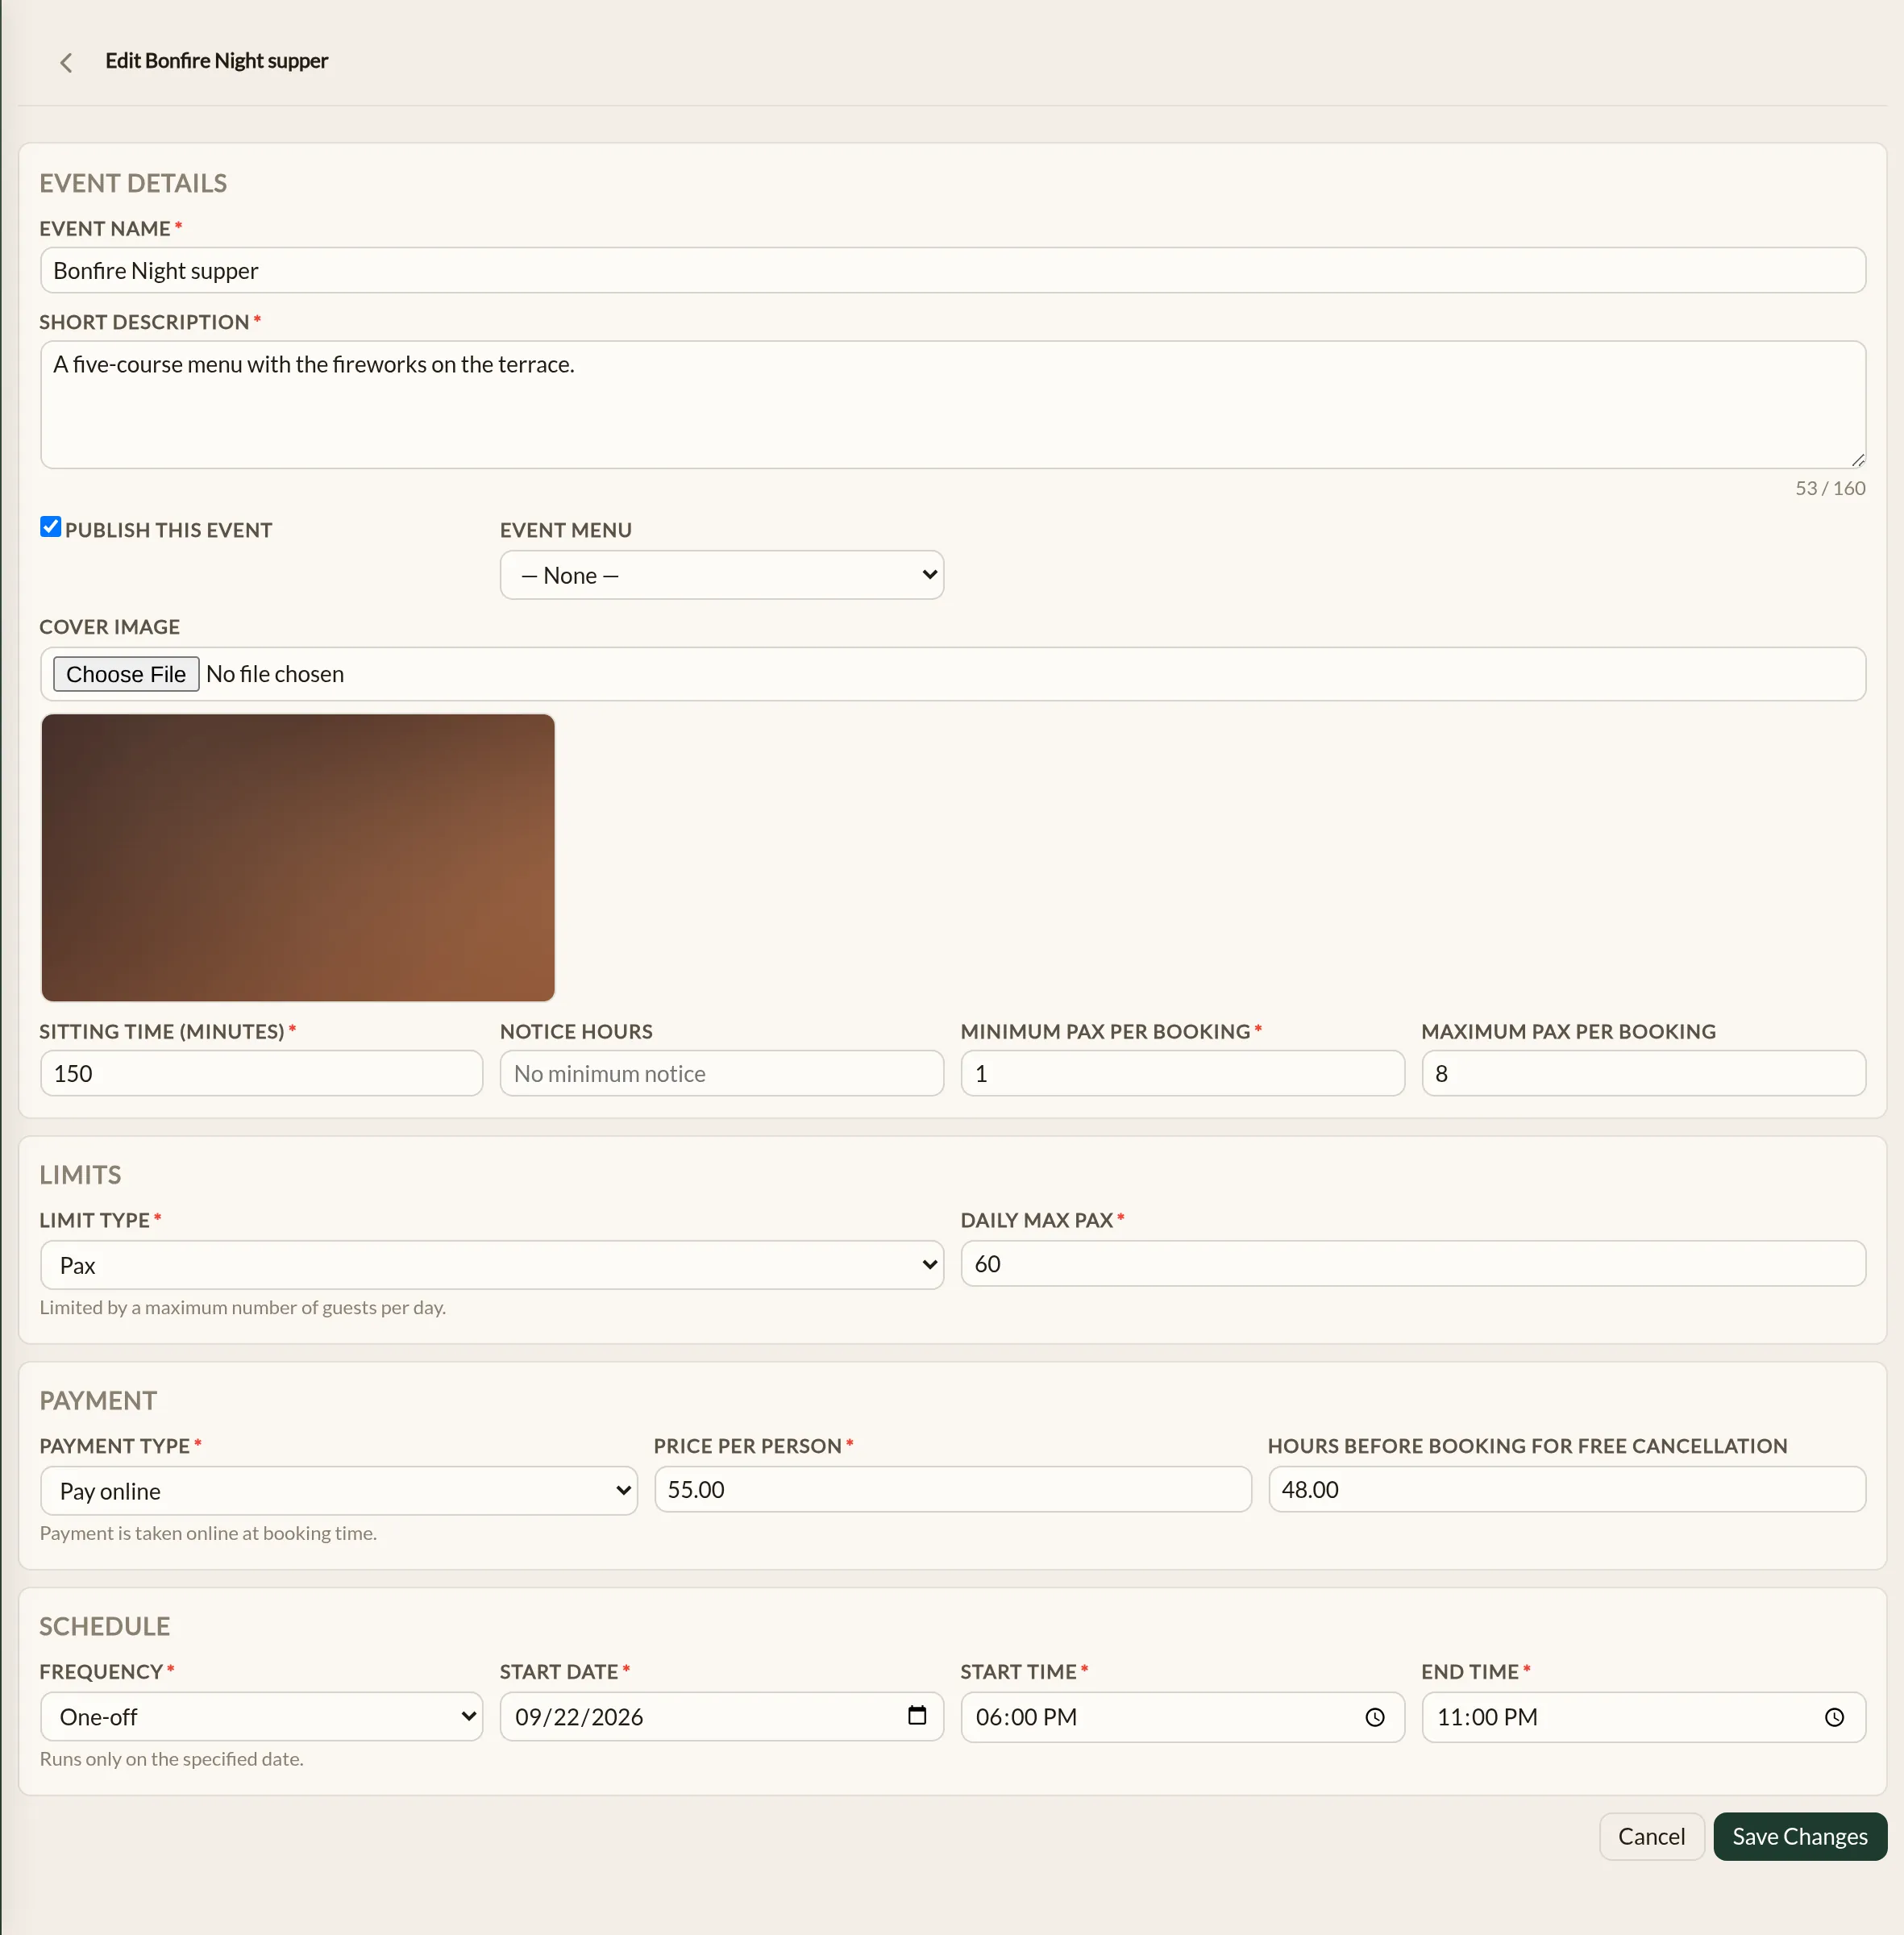
The form is split into four sections. You fill them all in on the same page, in any order, and click Save at the bottom.
1. Event Details
- Event name — what the event is called. Must be unique within your business.
- Short description — the line guests see in the listing.
- Publish this event — leave this unticked while you are still drafting. The event will not appear to guests until it is published.
- Event menu — optionally attach one of your uploaded menus to the event. See Linking a menu to an event.
- Cover image — The photo guests see on the listing.
- Sitting time (minutes) — how long a guest will be at the event. Used to work out when their table frees up.
- Notice hours — minimum lead time before a guest can book. Leave blank to allow last-minute bookings.
- Minimum pax per booking — the smallest party size you will take.
- Maximum pax per booking — the largest party size you will take. Leave blank for no per-booking limit.
2. Limits
Pick how the event is capped — by table availability, by total pax per day, by total bookings per day, or not at all. See Event ticketing and pricing for what each option does.
3. Payment
Pick whether the event is free, paid on arrival, paid online in full, or has a deposit. Paid options unlock a price and an optional free-cancellation window. Detailed in Event ticketing and pricing.
4. Schedule
Pick how often the event runs:
- Daily — runs every day from a start date, with an optional end date.
- Weekly — runs on selected weekdays only, between a start date and an optional end date.
- One-off — runs on a single date.
- Multiple dates — runs on the specific dates you add to a list.
- Date range — runs every day between a start and end date (no skipped days).
Whichever you pick, the event also needs a start time and an end time for each day. So a daily event from 1st to 30th April that runs 18:00 to 21:00 is one event, not thirty.
Publishing and unpublishing
Ticking Publish this event is all it takes for the event to appear on your Explore page. Whether a guest can actually book it depends on the date and time they pick: it has to be a day the event runs, inside the event's start and end times, outside its notice hours, within its party-size limits, and not already full. An event that cannot be booked for the guest's chosen date and time still appears, with a short note explaining why and, where possible, a link to the next slot they could book.
The detail page shows whether an event is currently Published or Unpublished. Toggle by editing the event and saving. Unpublishing an event hides it from new bookings immediately but does not cancel any existing bookings.
Editing and removing an event
Open the event from the Events list and use Edit to change anything on it. Changes take effect straight away.
To remove an event entirely, use Delete from the detail page. As with unpublishing, deleting does not automatically cancel existing bookings on the event — handle those first.
Events on your phone
On the mobile app, More → Events lists your events and opens each one with the guests booked on it. Switch the toggle in the right-hand rail to Mobile to read how it works.
Open More and tap Events. Events with a date coming up are listed first, soonest first, each with when it next runs, how that day is selling against its cap (for example "24 of 30 guests booked"), and whether it is published. Events with nothing coming up sit underneath. Pull down to refresh.
Tap an event to open it. The page shows the event's details — when it runs, its limit, how guests pay, party sizes, sitting time and any menu — and the guests booked for the date on screen, with the same summary tiles as the pre-shift brief: guests booked against the cap, bookings taken, parties still awaiting confirmation, and parties arrived. Use the arrows either side of the date to step through the dates the event runs. The page opens on the next date; an event that has finished opens on its last one.
Tap a guest to open their booking — the same sheet as on Today and in the Diary. Seating a party from there is how you check guests in; there is no separate check-in list. Cancelled and no-show bookings are left off the guest list and out of the tiles.
To change the event itself, tap Edit on web at the top of the page, which opens it on the manager site. Everyone on the team, Staff included, can see events on the phone and manage the bookings from them.
Where to go next
- Event ticketing and pricing — the Limits and Payment sections in detail.
- Linking a menu to an event — attaching a PDF or image menu so guests know what they are booking.
- How bookings work — once an event is published, its bookings flow through the same statuses as regular reservations.
See also: Restaurant events and ticketing